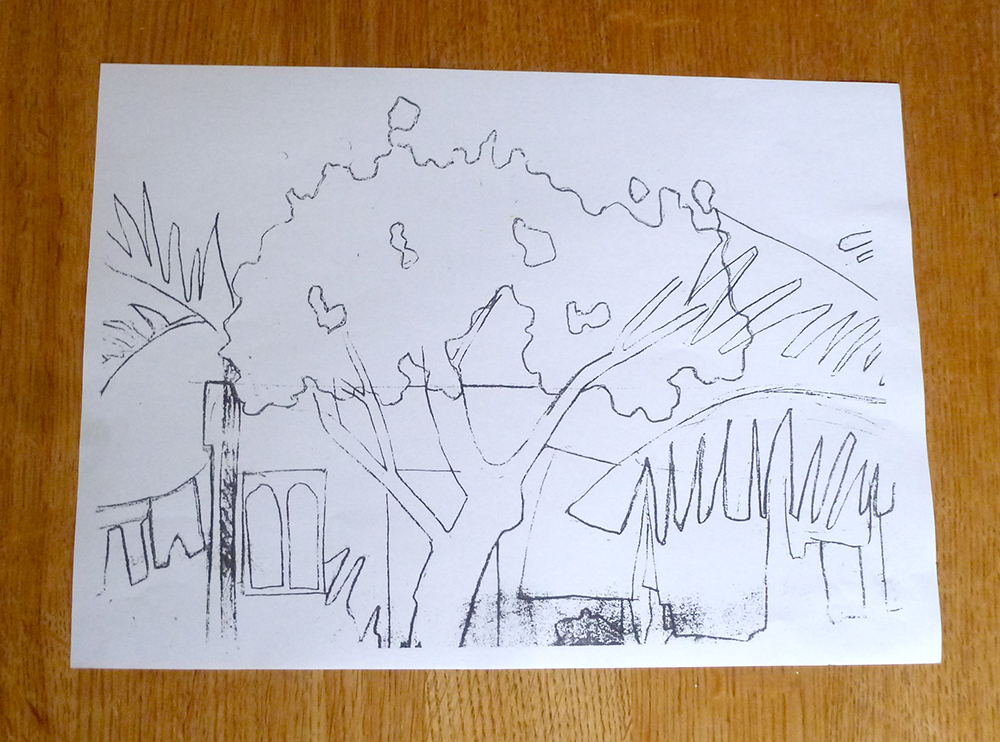
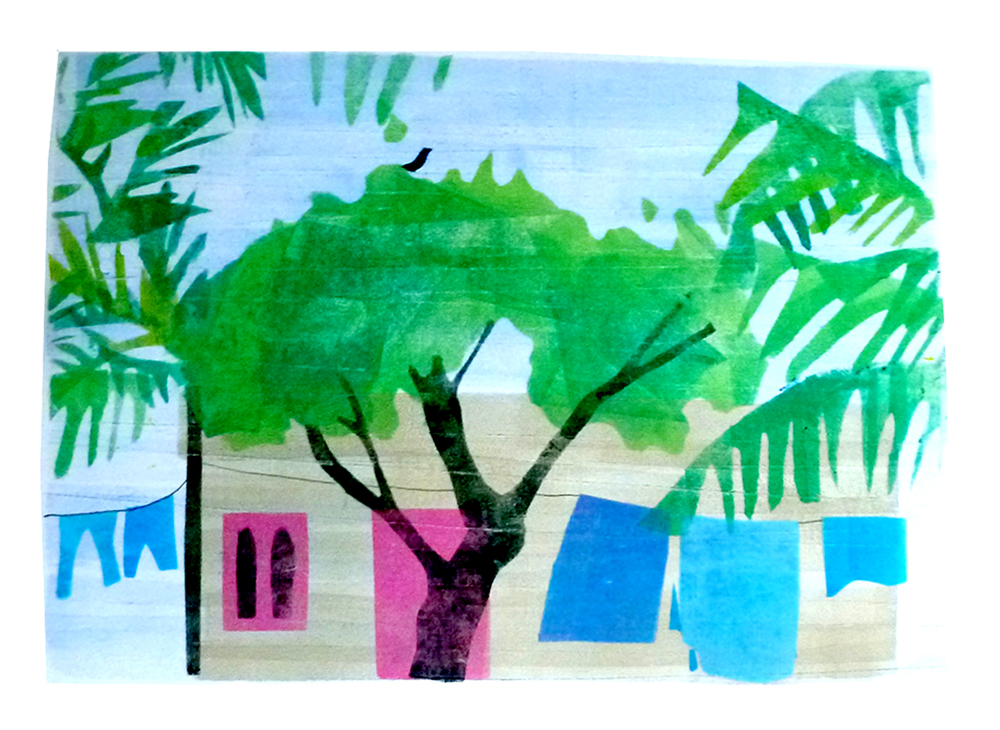
Week three of the stencil monoprint evening class was a little more out of my comfort zone. One of Sophie's drawings was used as a basis for everyone in the class to create a multi-layered stencil print - really surprising how different they all ended up looking. I found it quite a challenge working on a predetermined image, making decisions on colour and composition as each stencil was cut. However, it was really interesting to see how quickly you can build quite a complex print from a sketch, and also that there's room for a bit improvisation if things don't go quite to plan (see layers of foliage, and unwanted ink splotch that became a bird).
Heading South
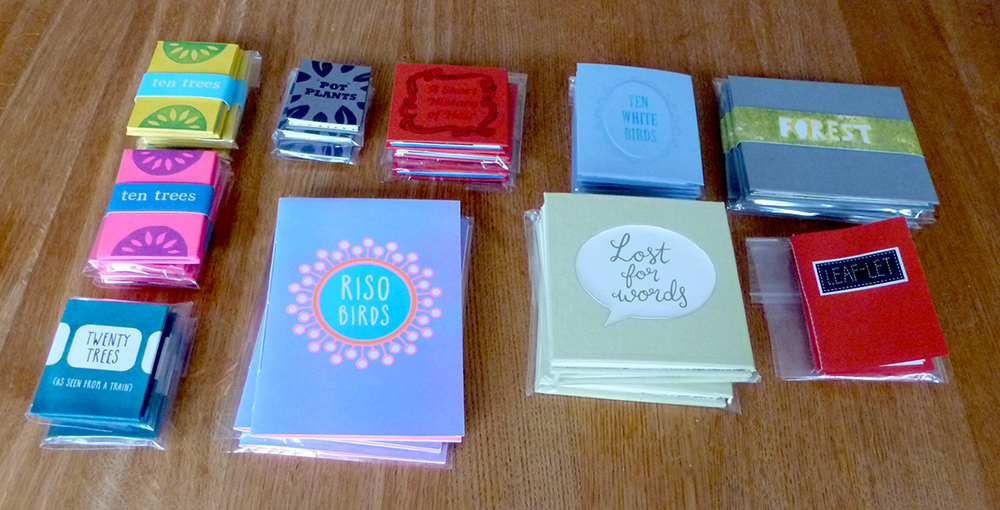
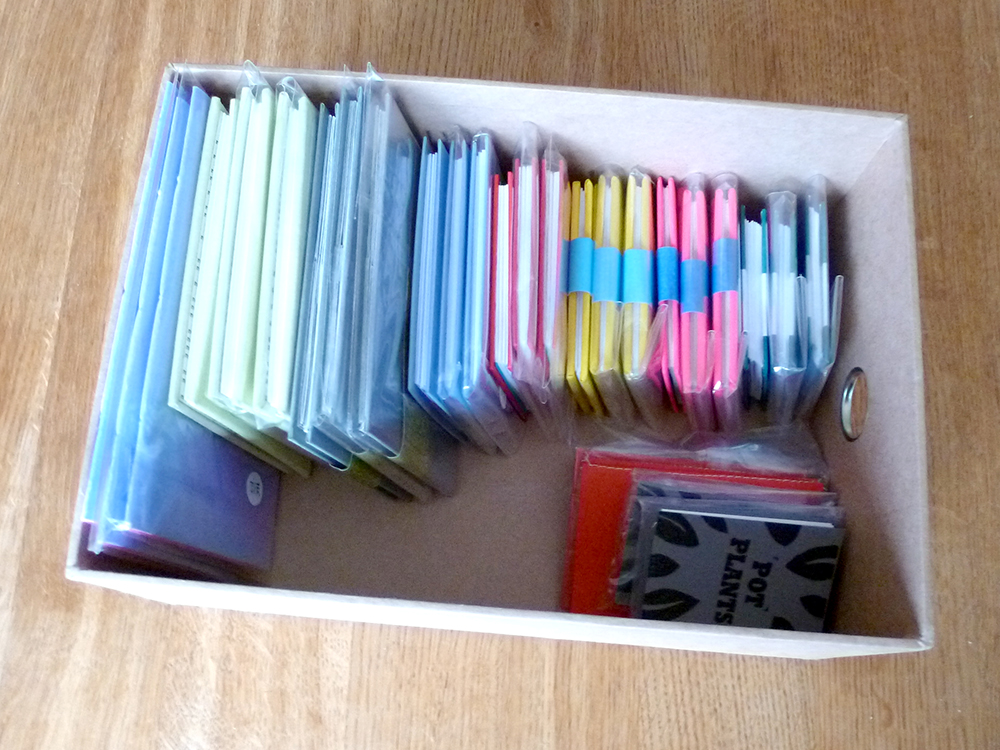
Packaging up books ready to hand over to the lovely Sarah Bodman to take along to Counter – Plymouth Art Book Fair (Saturday 24 October at KARST).
Stencils + folding
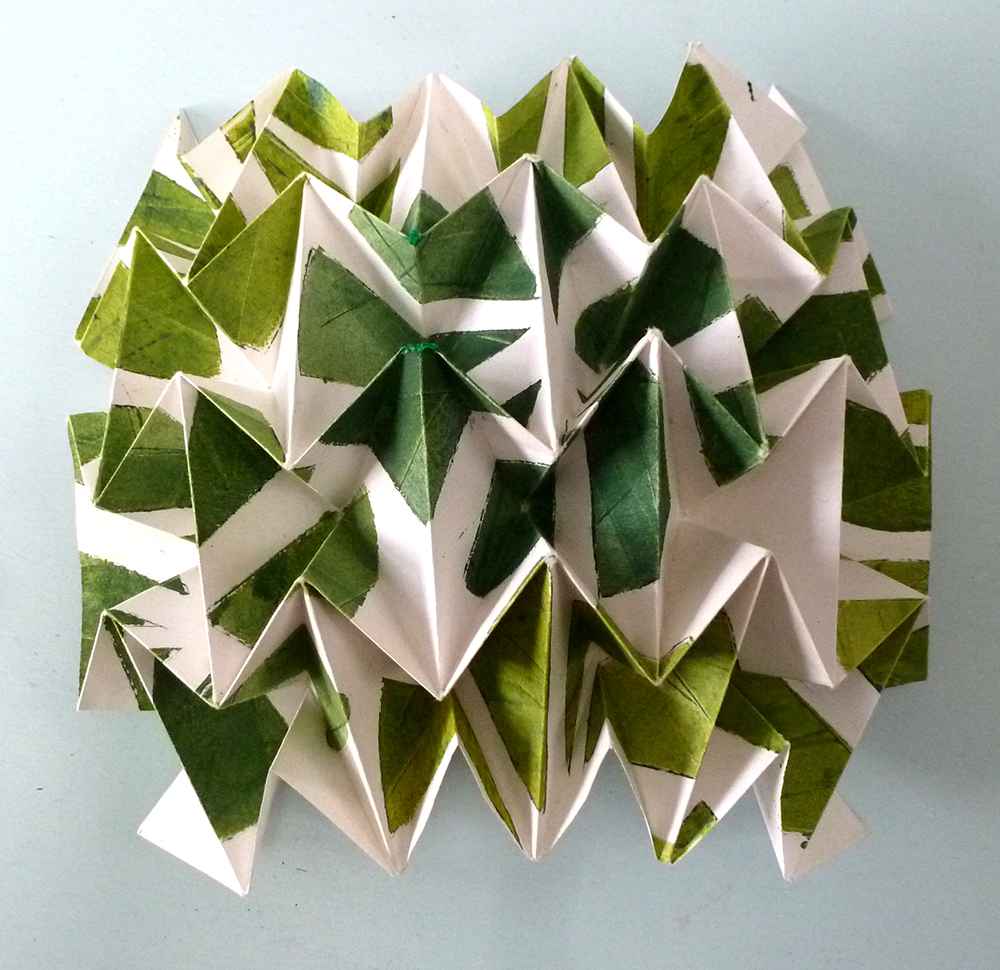

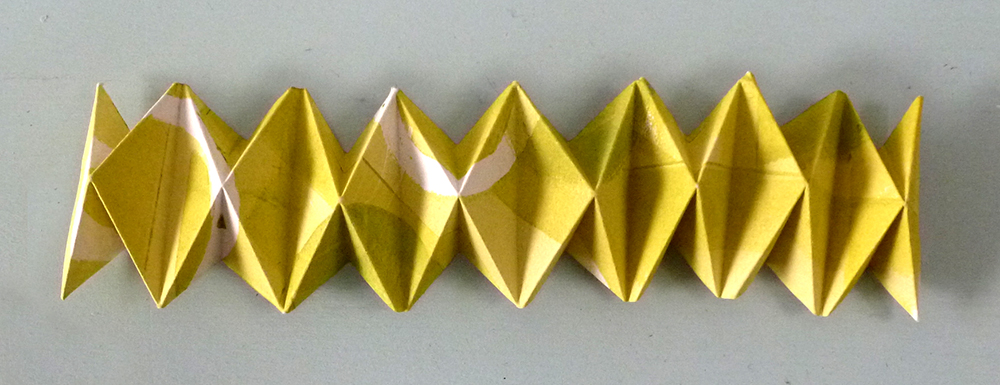
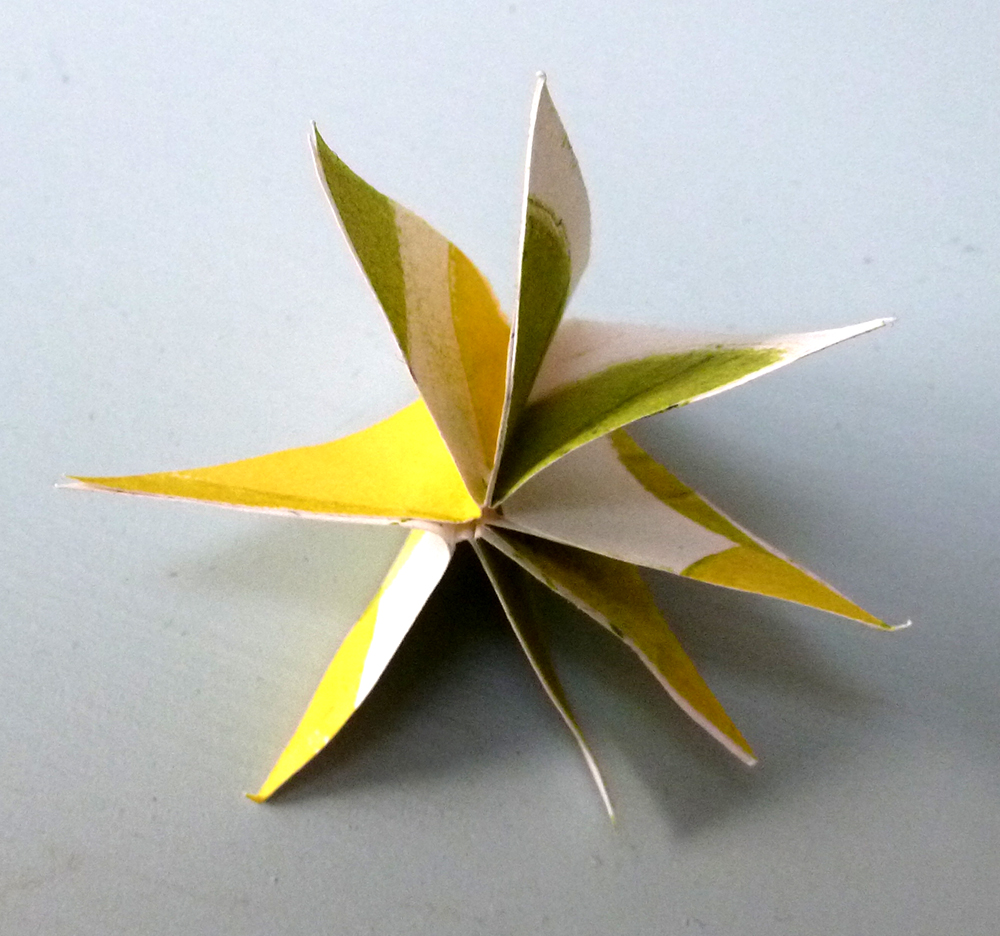
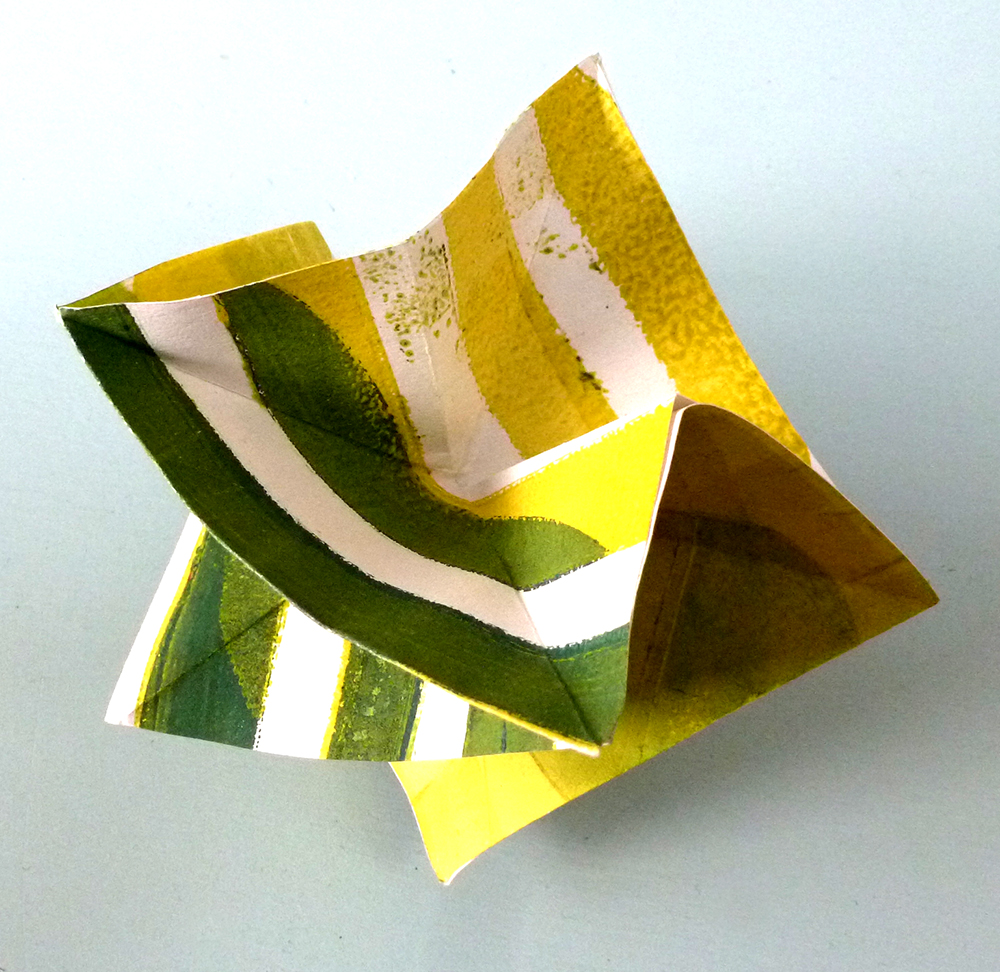
Playing around with patterned papers made on the stencil monoprint course - the random nature of the stencilling is an interesting combination with the geometric folds.
Stencilicious
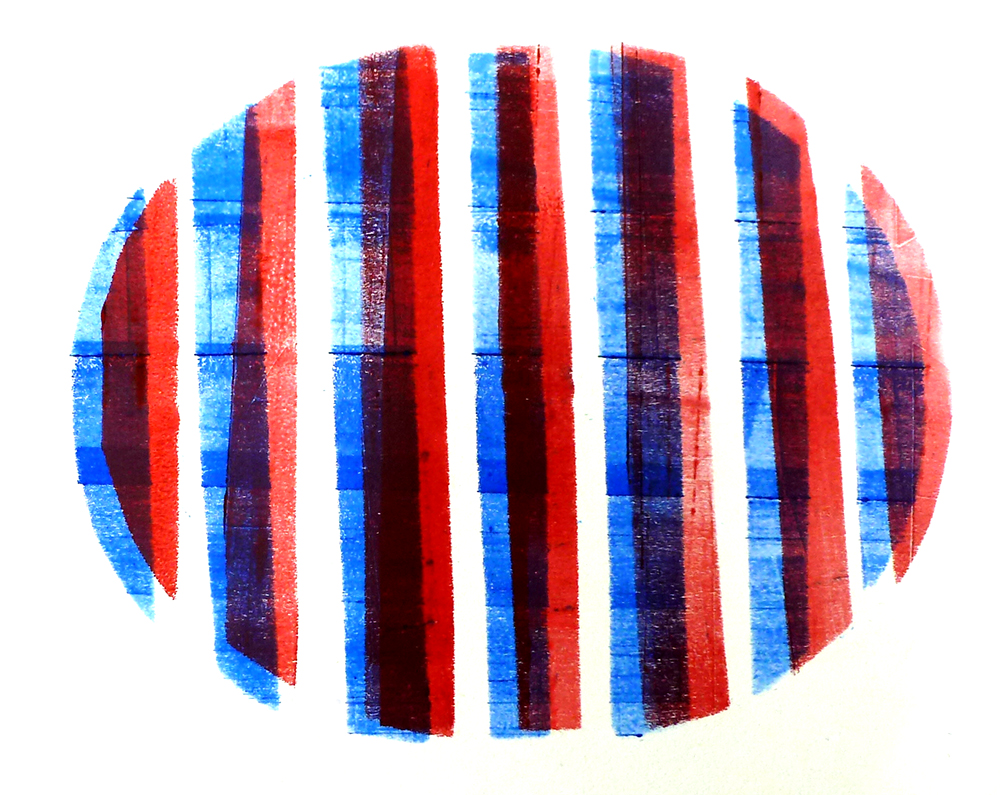


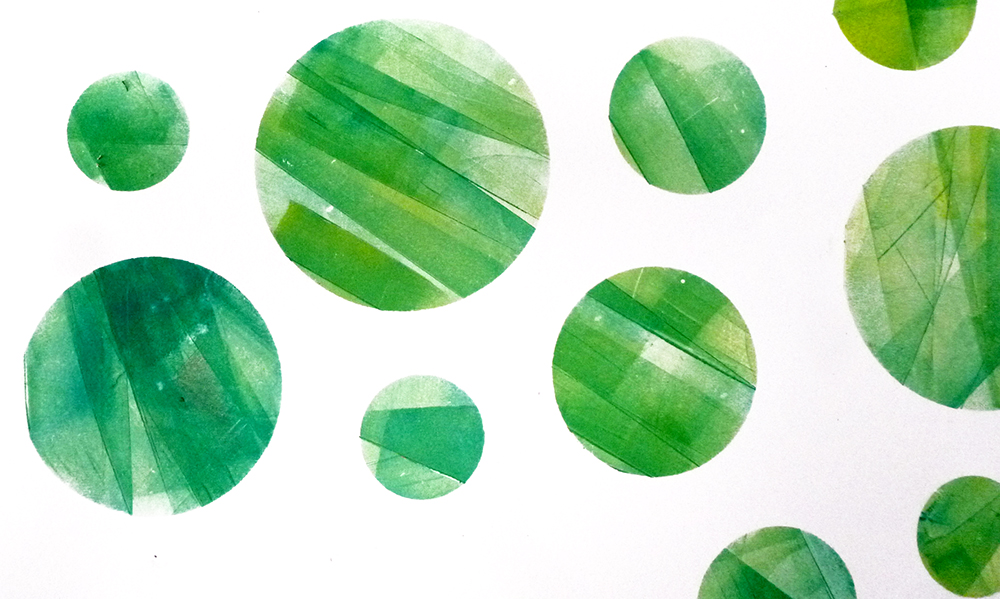
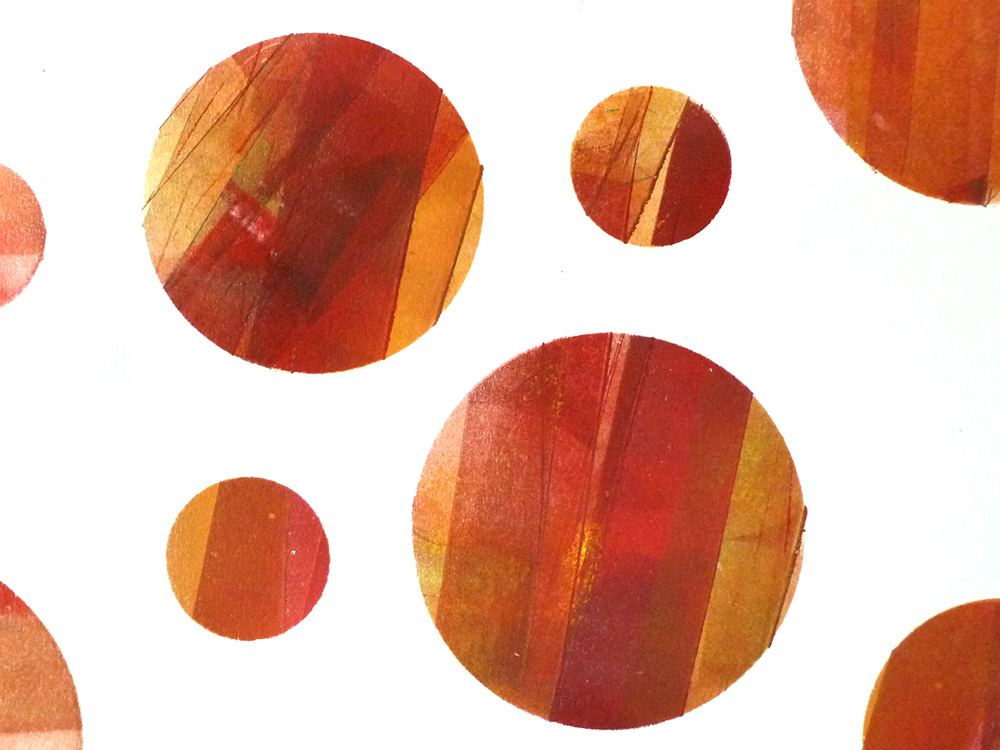
Just started a new evening class at the wonderful Folk House in Bristol - ‘Monoprinting with Stencils’ run by Sophie Rae. It was a really enjoyable first week, getting stuck in straight away. Just basic shapes with water-based ink, but I was amazed at the variety of tone and texture you can get with just using a roller. Lots of possibilities, but my first thought is that this would be an ideal method for printing patterned endpapers.
Some of my fellow exhibitors…
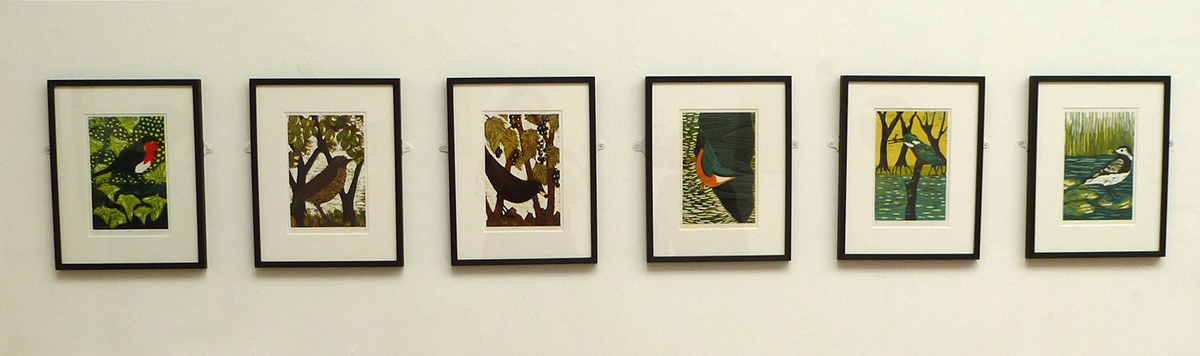
reduction woodcuts by Caroline Case
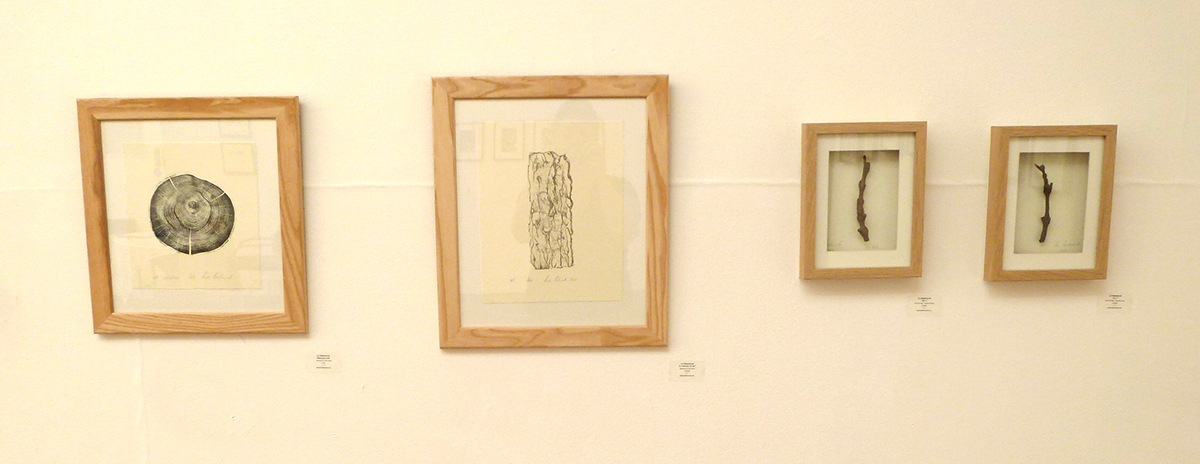
woodcuts and bronze/resin castings by Lin Biesheuvel
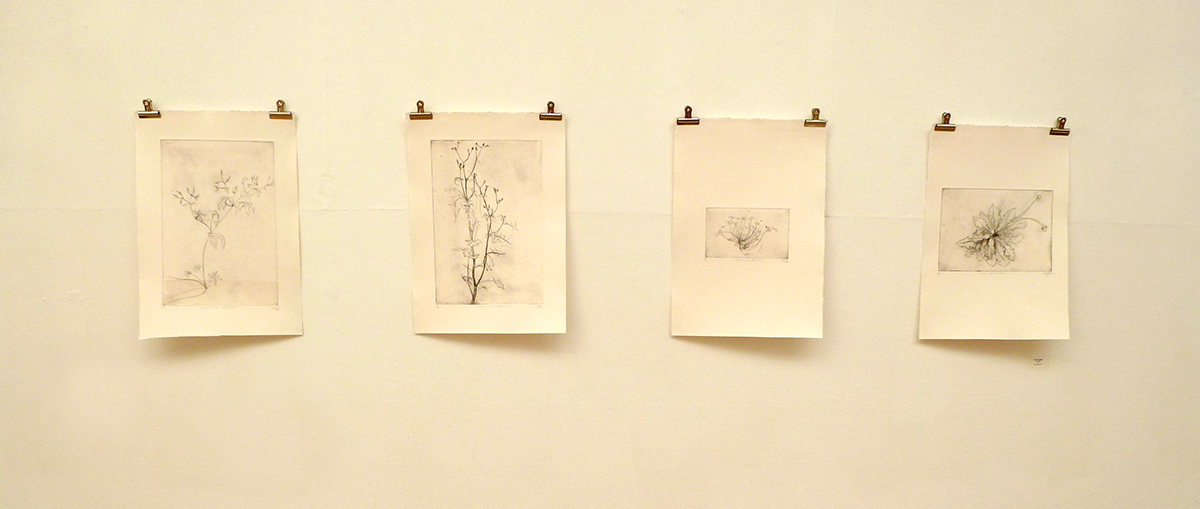
drypoints by Alison Sloggett
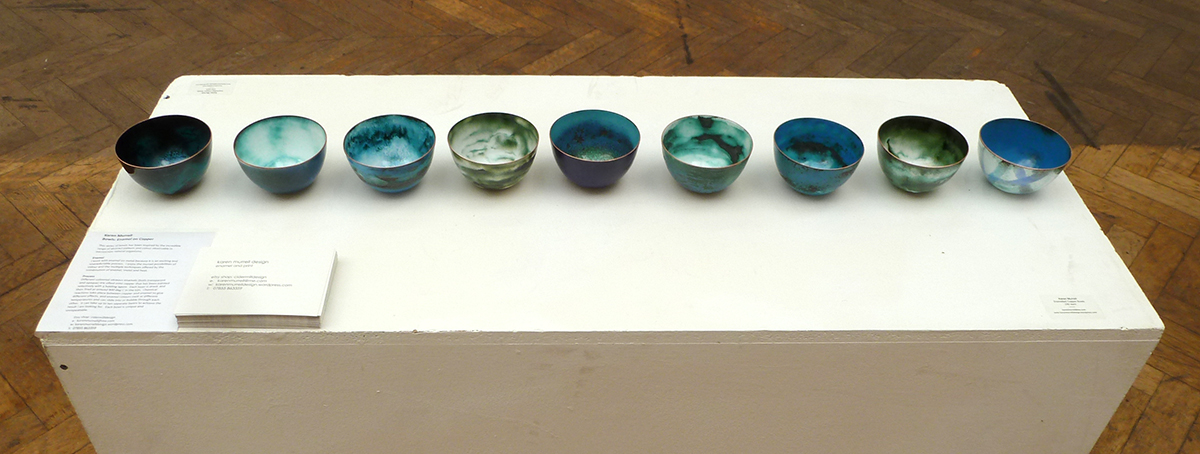
enamel bowls by Karen Murrell

etchings by Barbara Bluett
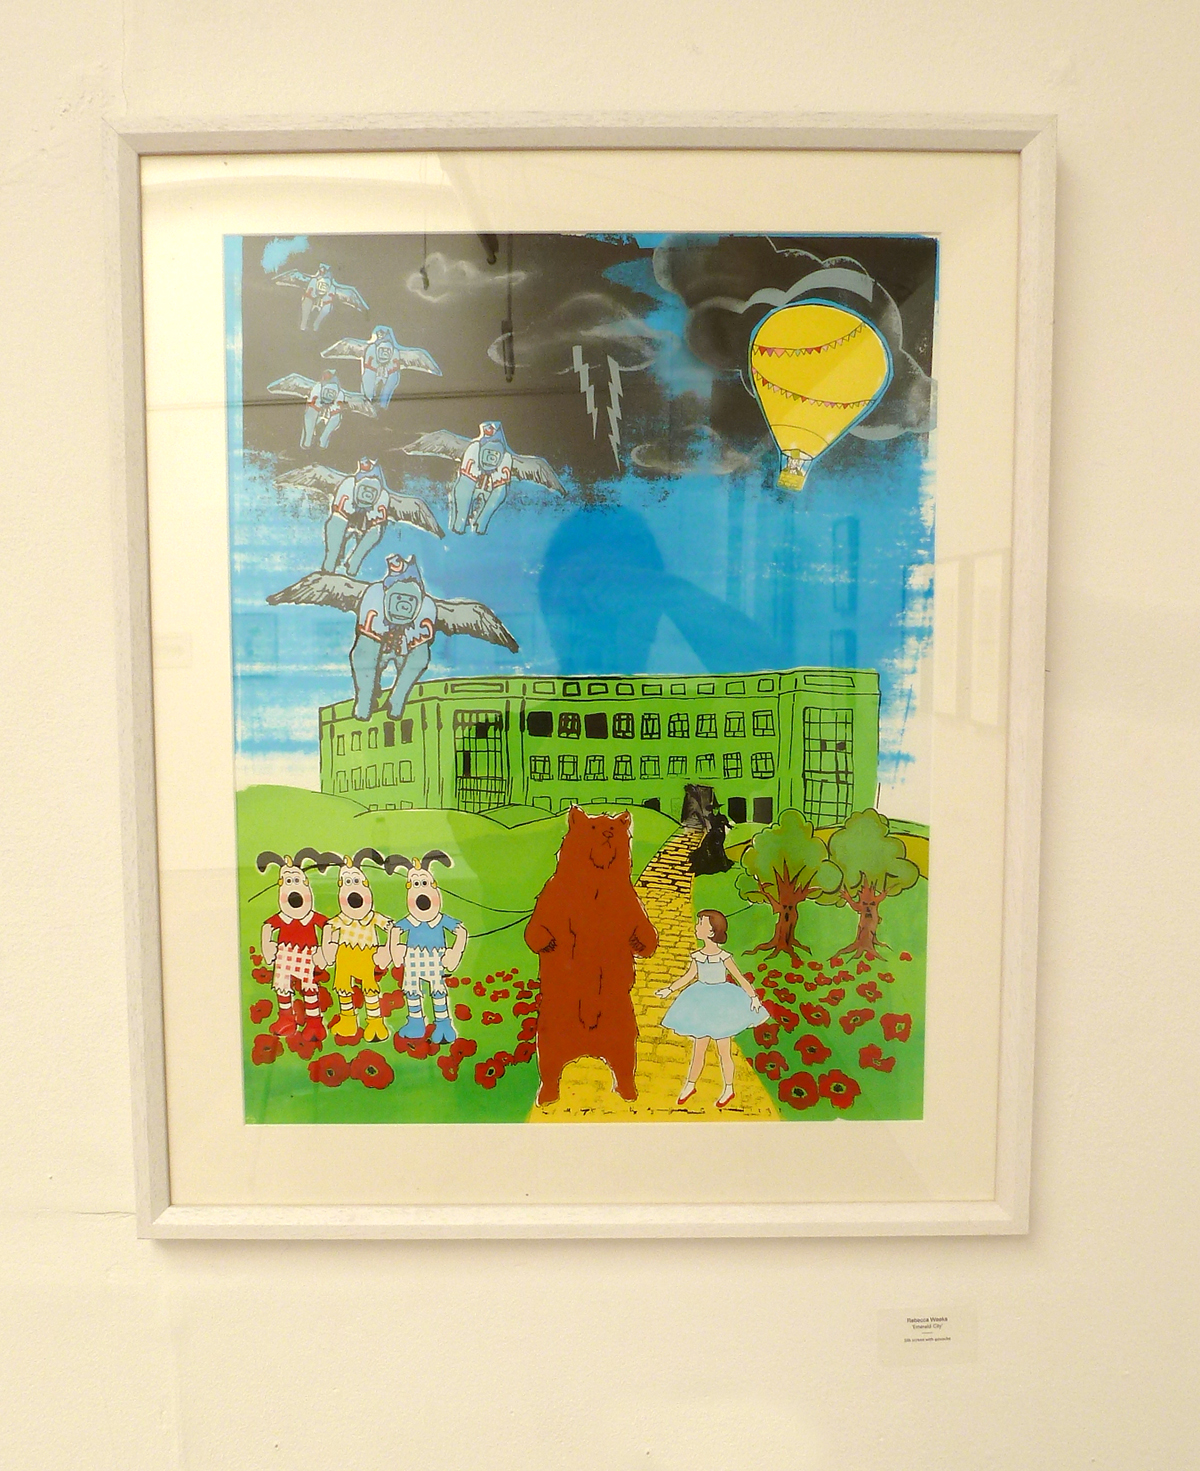
‘The Emerald City’ screenprint by Rebecca Weeks
The ‘Second Nature’ exhibition at The Island in Bristol by The Out of Print Collective.
Ready to roll

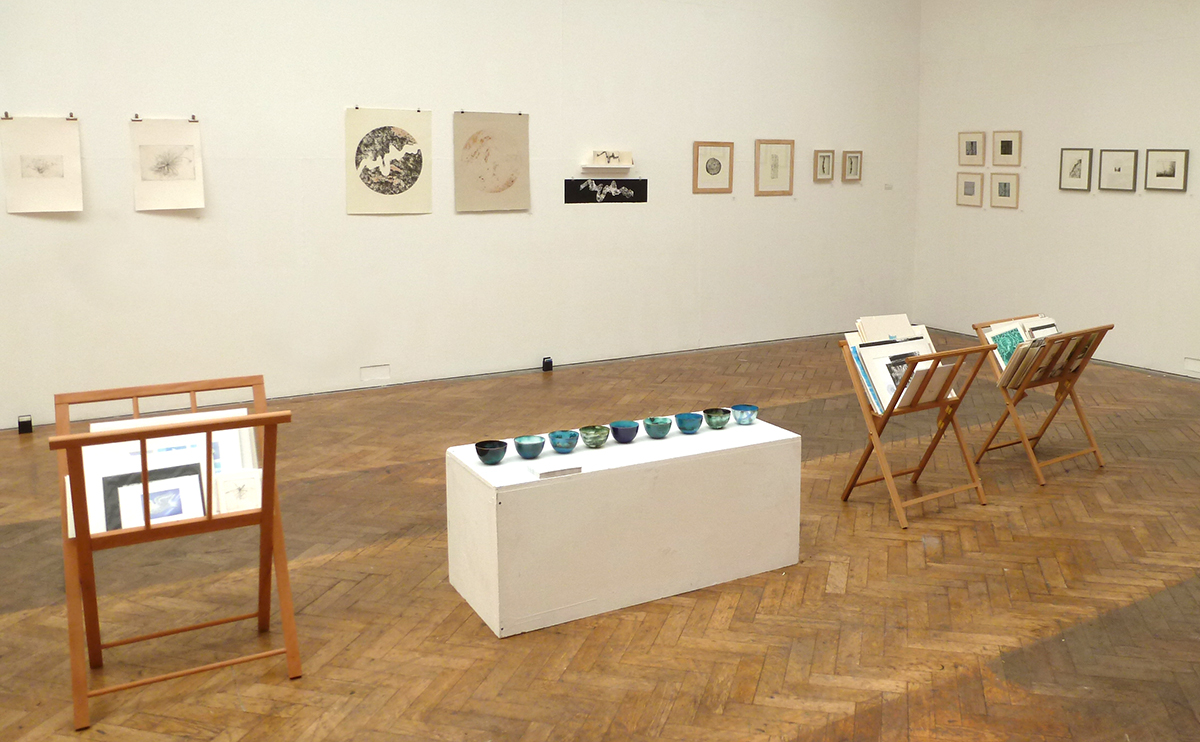
Phew, exhibition all set up at The Island. I’ve used various acrylic plate stands and jewellery display plinths to display my books - it definitely seems to help to give them some height without cluttering things up too much.
Hope to see you at the exhibition - opens tomorrow (4 September) and runs until 5pm on 9 September.
Second Nature

Just making final preparations for taking part in a group exhibition opening next friday. Four new books will be on show, as well as some more established favourites made earlier in the year.
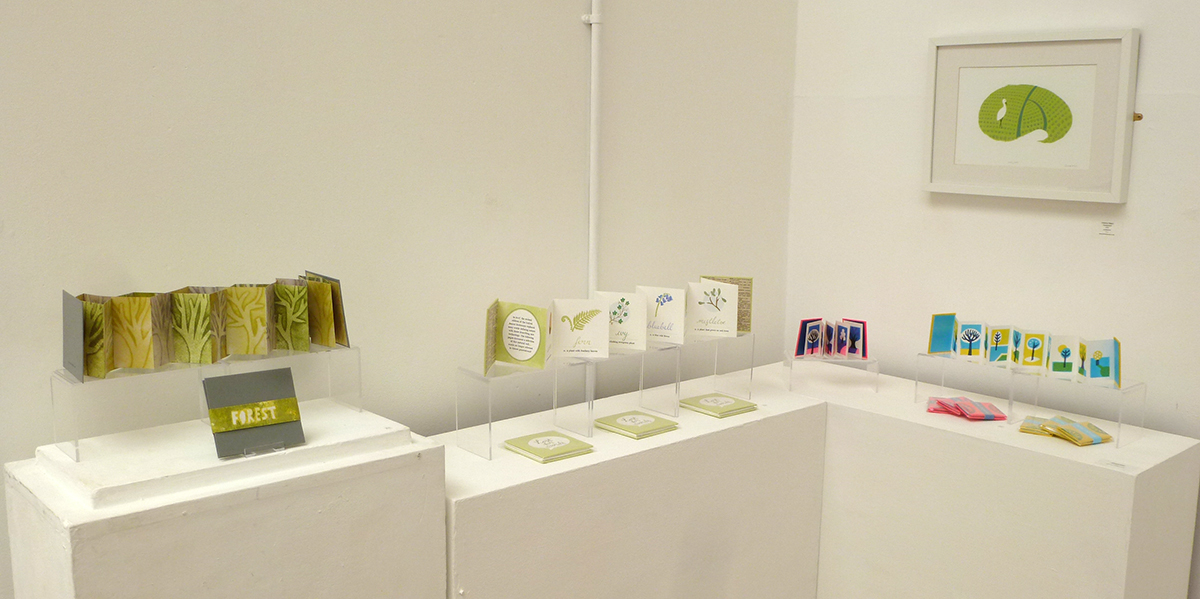
Forest
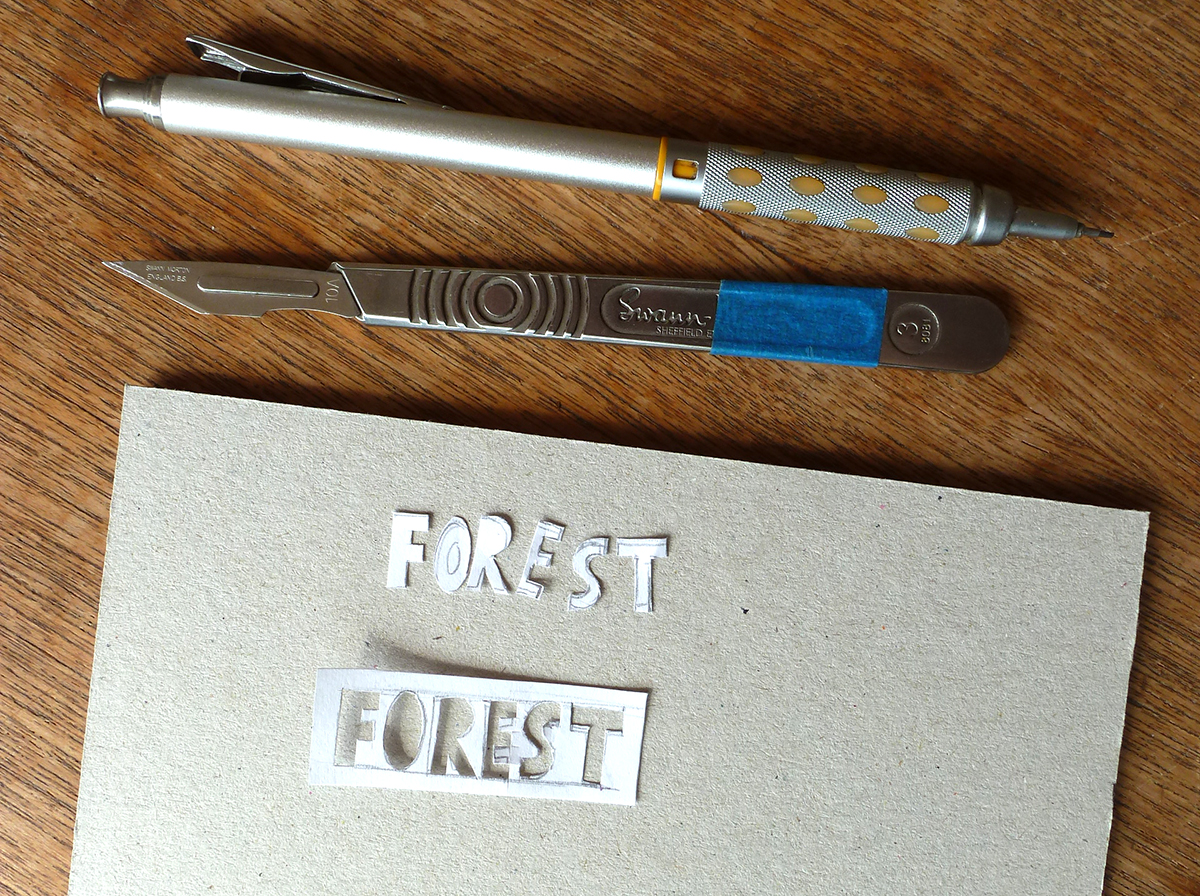
Stencil for rubber stamped title
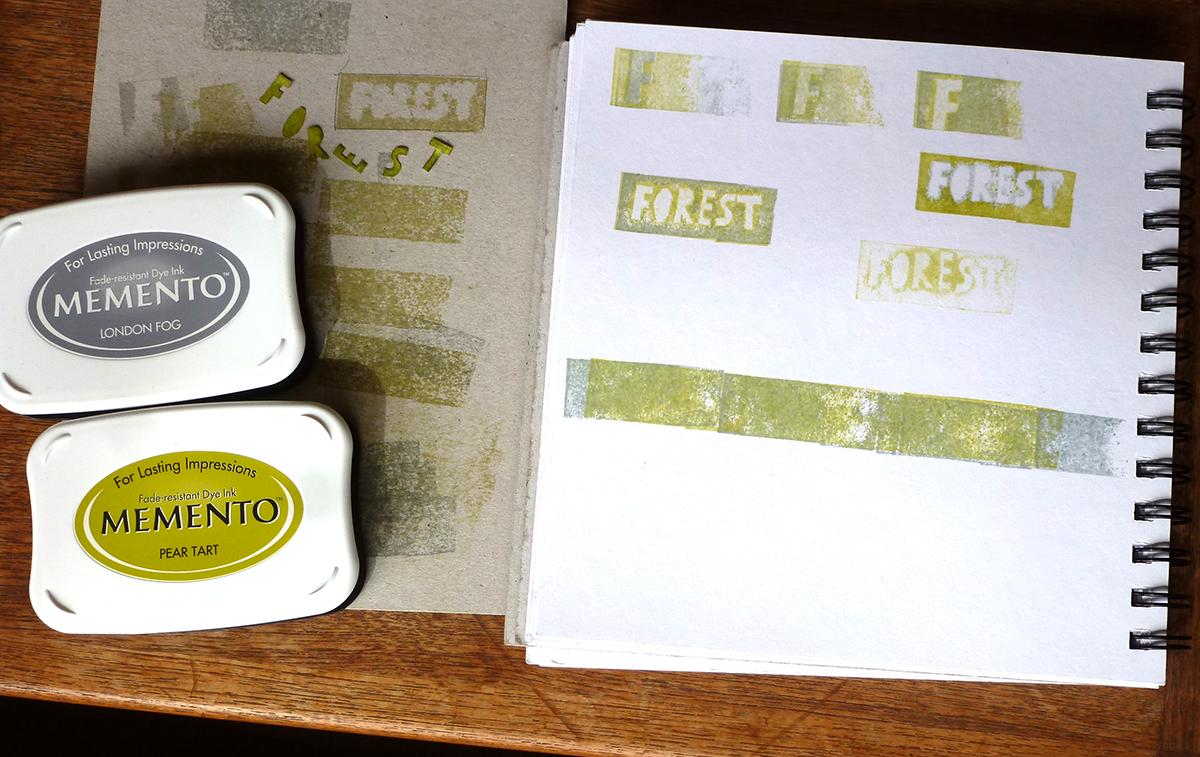
Trial and error with stencils and stamps

Small-scale mock-up to work out pagination when setting up the artwork
A re-working of a one-off book of rubber stamp stencil illustrations I made a couple of years ago. I deconstructed the original book and scanned each page before enlarging the layout and getting it digitally printed as flat A2 sheets (by the excellent printed.com). I created new stamp-stencil artwork for the title bellyband. The format is a double concertina, which took a bit of head scratching to get the pagination correct. But it’s a very pleasing, solid structure once assembled. Scalpel at the ready to cut down and make up the first ten...
Leaf Labels
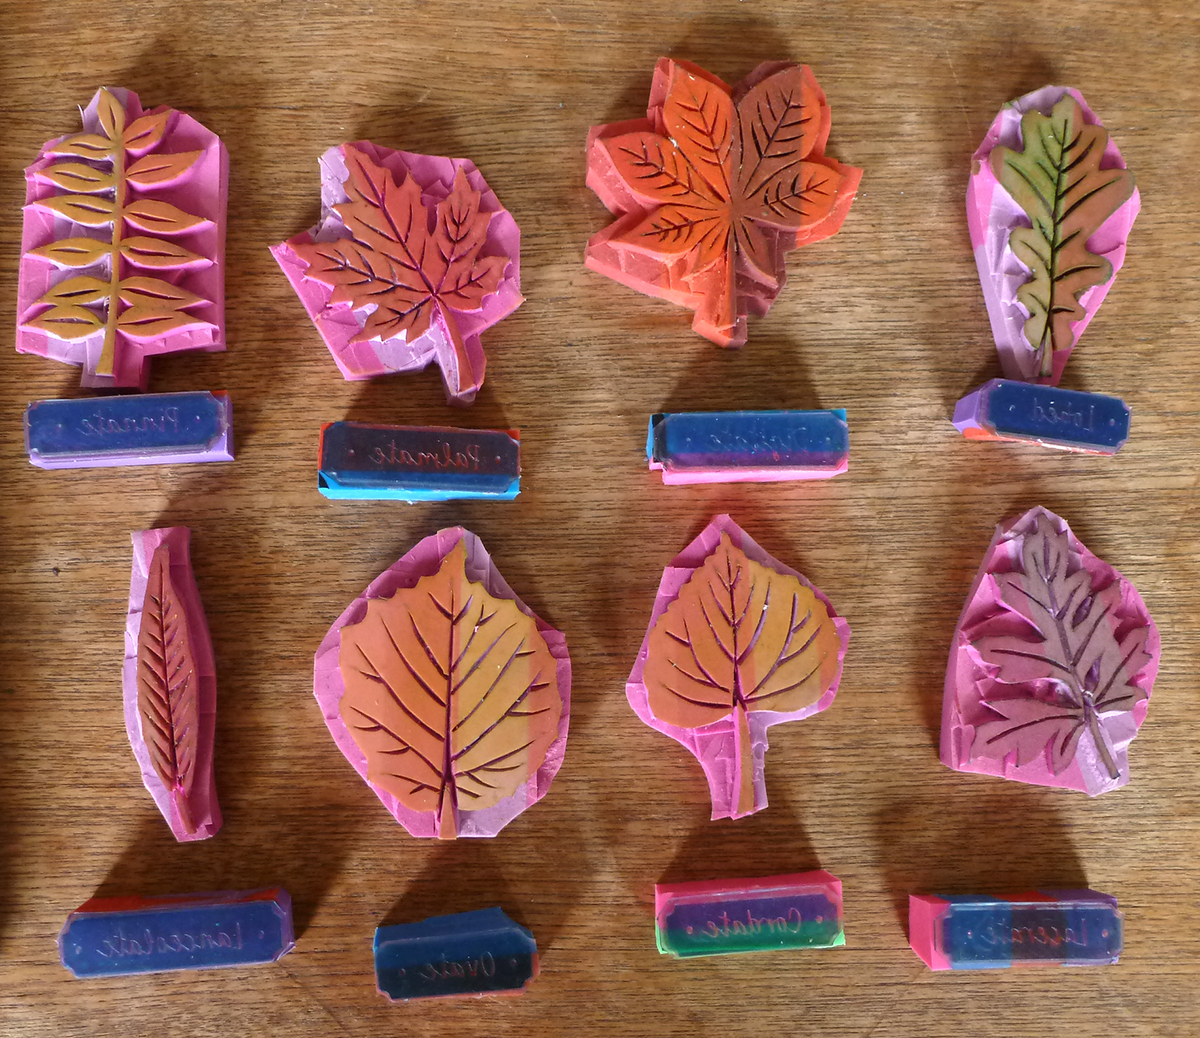
Hand carved rubber stamp leaves and photopolymer stamp labels
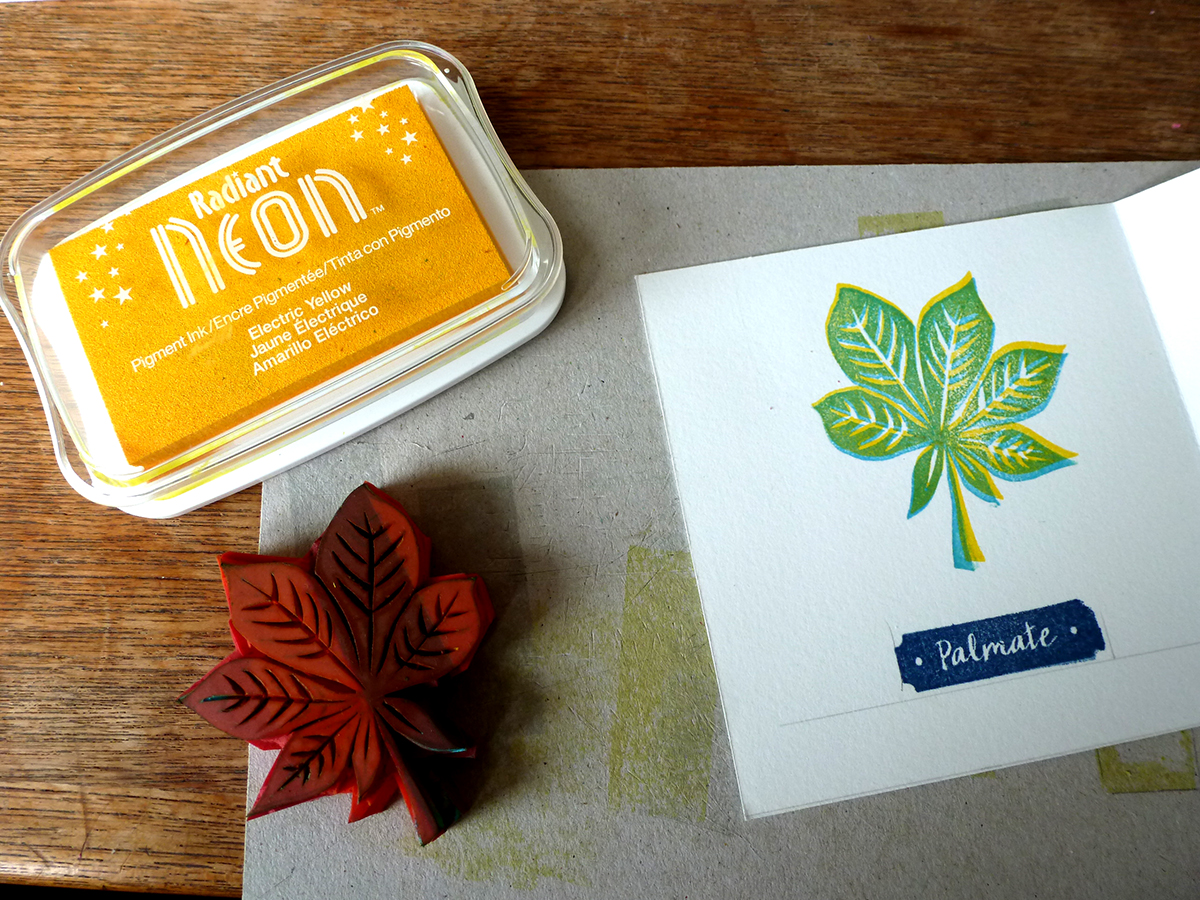
Leaves printed in yellow and blue neon ink, labels printed in midnight blue

Work in progress
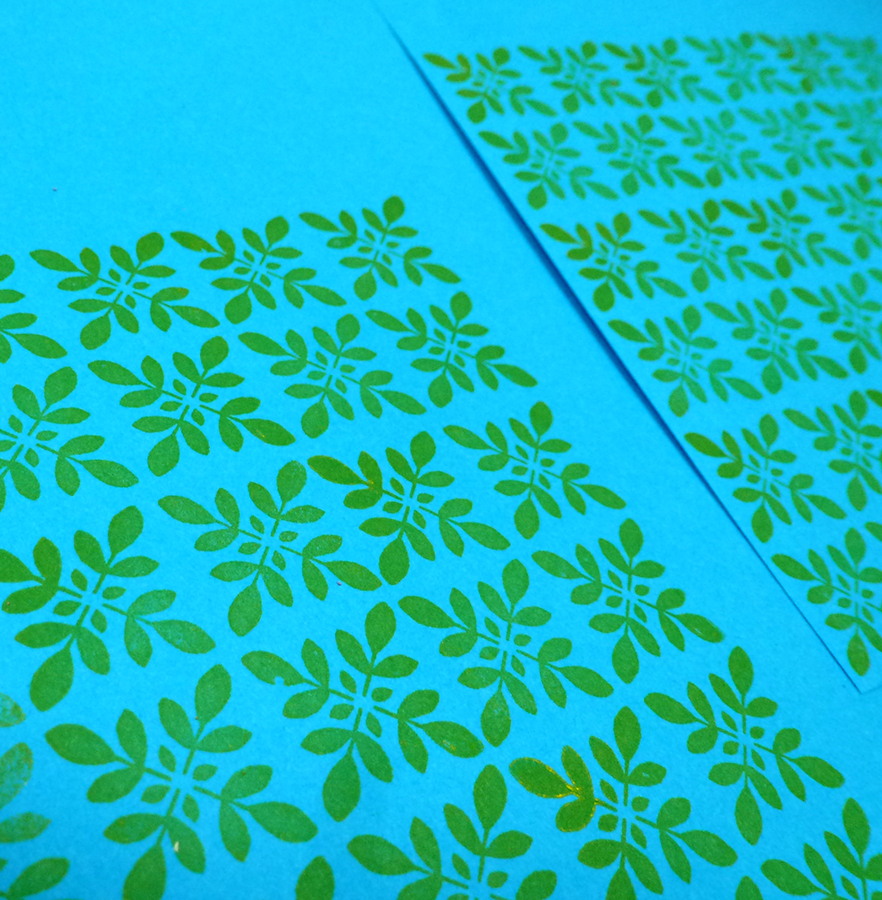
Endpapers printed with photopolymer stamp made from a hand drawn leaf pattern
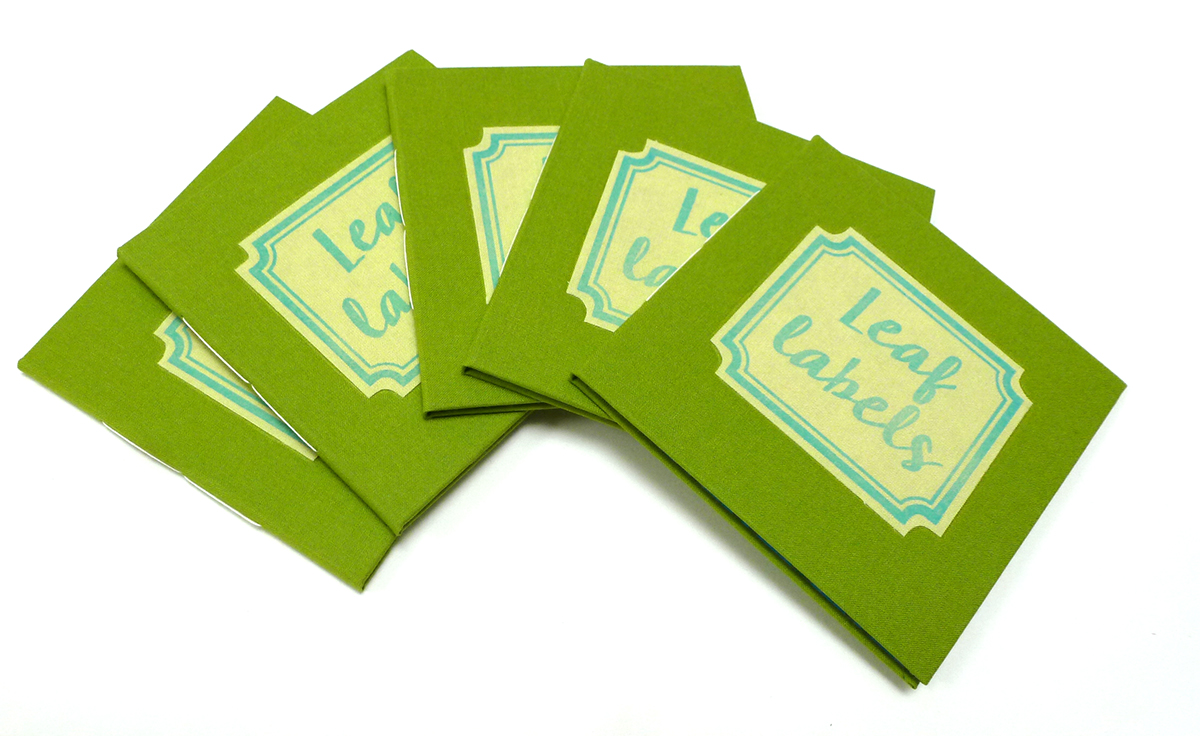
Five finished copies
A new book – cataloguing of the names of different leaf shapes. I used the rubber stamps I carved for my first book ‘Autumn Leaves – A Pocket Guide’ but printed them with my new neon inks. Printing the blue on top of the yellow makes a good bold green, with the added bonus of extra colours when slightly mis-registered. The colour prints well on the heavy Somerset velvet paper. The labels are photopolymer stamps I made, and printed in midnight blue. Endpapers are also a photopolymer stamp I created from hand drawn leaf pattern. The neon yellow ink prints really well on bright blue paper… makes your eyes jump. Cloth covered boards for the cover with a book cloth label and pamphlet stitching. To be added to the shop very soon...
Let there be colour…

Woodcut plates before assembly
Inked up plates assembled in a jig
First print of the first layer
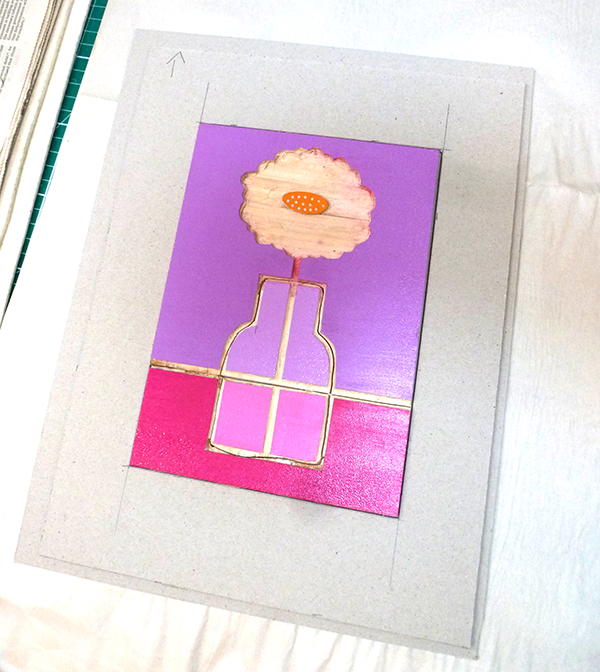
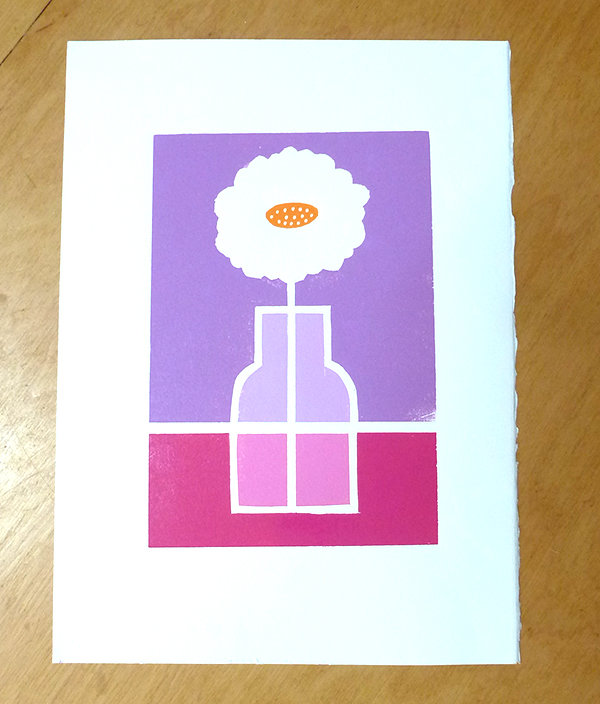
The first layer of my jigsawed woodcut. Small rollers are essential to avoid muddying the colour separation. All the inked component parts are held together in cardboard jig before printing. Very excited to be able to print five colours in one press. Petals and patterned background will be added on the next layer…
Beginning a jigsaw puzzle
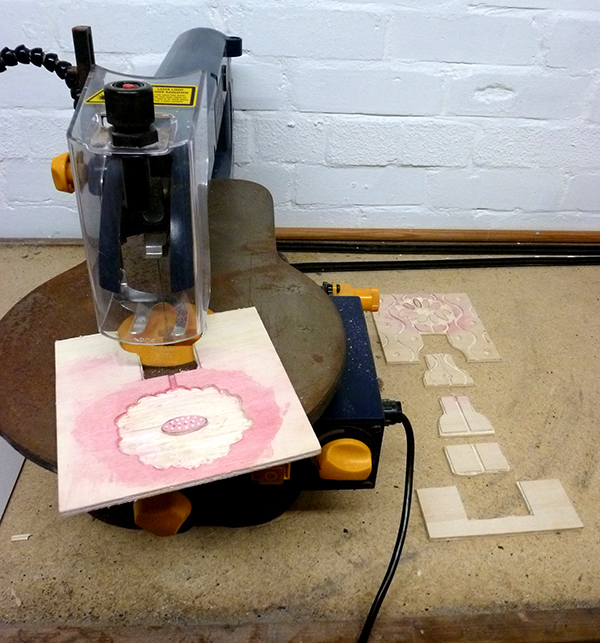
Jigsawed woodcut plates
Finally got round to dusting off my scroll saw and cutting some woodcut plates into jigsawed component parts. This will enable me to print multiple colours at one time without needing to worry about registration.